We hadn’t intended on visiting the infamous Isandlwana and Rorke’s Drift before our trip, but met a few people that said it was definitely worth the time – how right they were.
This isn’t a full account as there are many versions and numbers on the internet, so this is one very short summary, based on Wiki.
Colonial Britain was expanding in Southern Africa and they gave the Zulu nation an impossible ultimatum to give up their arms. After the ultimatum expired, Lord Chelmsford led the British forces in the Battle for Zululand and invaded it from the neighbouring Natal province on the 11th of January, 1879. The British had state of the art weaponry and the Zulus had their traditional assegai (stabbing spear), knobkerrie clubs and cow-hide shields. They also had some old guns, that they hadn’t been trained to use.
The British got to Isandlwana on the 20th of January and set up camp, but did not entrench and circle the wagons to form a protective laager. Much debate is had about this, with some saying they weren’t planning to stay very long and others saying the British command seriously underestimated the Zulu numbers and capabilities. After some skirmishes with some early scouts sent out, Chelmsford split his men and took a large number to where he thought the majority of the Zulus were. This left around 1,300 at Isandlwana, with around 1,000 modern rifles and two 7-pound field guns.
What Chelmsford thought to be the main body of Zulus was in fact not; they, some say 20,000 of them, were actually in formation near Isandlwana and were discovered, sitting silently, by some British scouts on the 22nd of January. They then began advancing on the British camp. A message was sent to Chelmsford to return to camp, which he didn’t do for some time.
The Zulu formation was that of a buffalo head, with the main parts consisting of a number of groups which would advance on the enemy. The two horns would then encircle the enemy, who were busy fighting the main thrust, and cut off any retreat. The Zulu groups were divided by age.
There was a total eclipse at 2:29pm which must have added to the grim state of the battlefield.
The Zulus routed the British and one of the Zulu reserve groups (about 4,000 who hadn’t been directly involved in Isandlwana, but some think they also wanted to ‘wash their spears’) followed some retreating soldiers to the hospital at Rorke’s Drift and spent all evening attacking a group of 140 people, many of whom were already wounded but who ultimately defended their position against all the odds, their hastily-erected barriers made from mealie bags found in the store rooms.
In the meantime Chelmsford returned to Isandlwana to a scene of devastation, with hundreds of his men dead and wounded. The recriminations were fairly severe as you can imagine (against the British commanders as well as the Zulus) and a second invasion happened which led eventually to wiping out most of the Zulu nation.
But until our visit we knew little of this, other than faint memories from the rather sketchy and somewhat inaccurate version of events given in the epic film “Zulu”. We started at Isandlwana. It was an eerie place, standing where the camp was below the hill looking out at the large valley to the right where Chelmsford was seeking out the Zulus and up at the hills to the left where the majority of the Zulus came from. You can’t imagine what it must have felt like seeing a huge number of your enemy coming over the hill towards you.
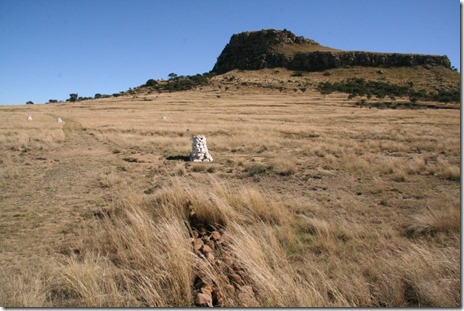
Isandlwana hill with cairns that mark some of the mass graves of the British
Looking with Isandlwana behind us out over the valley. Zulus came from the left hand hills
There is also a monument to the fallen Zulus here. Their numbers were not recorded (they did not keep records in the way that the British did) but probably matched those of the British. It was commissioned only after Mandela became president…
Zulu memorial, representing a necklace of honour awarded to brave warriors
We then drove to Rorke’s Drift (a ford near what had been a trading post once belonging to Jim Rorke). The original buildings have been replaced, but there is an outline of the old buildings for you to walk around after visiting the museum. The area the British defended was tiny. Again it was difficult to imaging the fear and noise of the battle that lasted for hours overnight on the 22nd.
Monument to the fallen British at Rorke’s Drift
It was very interesting and very sobering to see the small model of the battle in the museum, showing the trading post and it’s defences with a small number of red figures for the British and an enormous number of Zulus attacking it. The whole day took much longer than we expected and we were due to visit our friends Maxi and Jake, who lived miles away near Pietermaritzberg, that afternoon. We left and tried to make it as quickly as possible…


